AVA REICHARD, RDN, CDCES
  • Home
  • About
    • About
    • Portfolio
  • Blog

sweet potato breakfast sandwich

1/27/2019

 
Picture
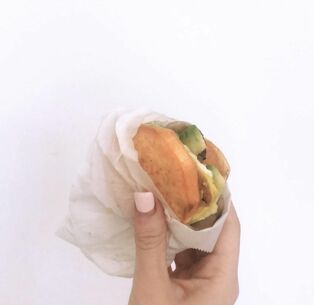
After a long week interning in critical care, I decided to do something extra to celebrate the weekend. Something I always do after a long week is go to either Trader Joes or Wegmans (sometimes both) and purchase random items- and then brainstorm what  I can do to make something out of it. This week- I bought sweet potatoes. I ended up making a sweet potato breakfast sandwich in a few simple steps. Instructions below: 


Yield: 3 
Ingredients:
- 1 medium, round sweet potato
-  2 eggs
- 2 alfresco's Chicken sausages ( I like this brand because it  has a chicken sausage option and is lower in saturated fat, sodium, and is made without preservatives) 
- 1/2 avocado 
- 1 tbsp olive oil

Instructions:
1) Slice the sweet potato into 1/2 -1 inch rounded pieces. Coat in olive oil and bake at 400F for 15 minutes.
2) Microwave or pan-fry chicken sausages. Cut into 1/2 inch pieces. 
3) Prepare eggs on stove top, omelette style  (this makes it easy to cut out for the sandwich, and you can add cheese or vegetables as you wish)
4) Slice avocado
5) Put together your sandwiches and enjoy!


Jicama fries

4/24/2018

0 Comments

 
This week, I decided to make jicama fries. Jicama is lower in carbohydrates than a potato, yet is comparable. As an experiment, I made two different batches. For the first recipe, I used double the garlic powder and no onion powder. The second recipe used onion powder instead. The first recipe looked more pigmented and appealing, yet did not taste as good as the second recipe with onion powder. Below is what I put on my jicama! 


Seasoning (for 1 medium jicama)
1 tablespoon melted olive oil
1/4 teaspoon paprika
1/4 teaspoon garlic powder
1/4 teaspoon onion powder
1/8 tsp cayenne
1/4 tsp sea salt


Instructions:
  1. Preheat oven to 400 F.
  2. Slice jicama into 1/4 inch fries. Note- the thinner you make the jicama, the more crispy and pleasant tasting.
  3. Microwave the fry slices in water for 7 minutes. It is important for the fries to soften before adding the seasoning.
  4. Take the fries out of the microwave and drain them using a colander.
  5. Toss fries with the seasoning
  6. Bake for about 30 minutes or until  you see the fries getting crispy. For best results, turn the fries onto their other side 15 minutes into baking.
  7. Enjoy!

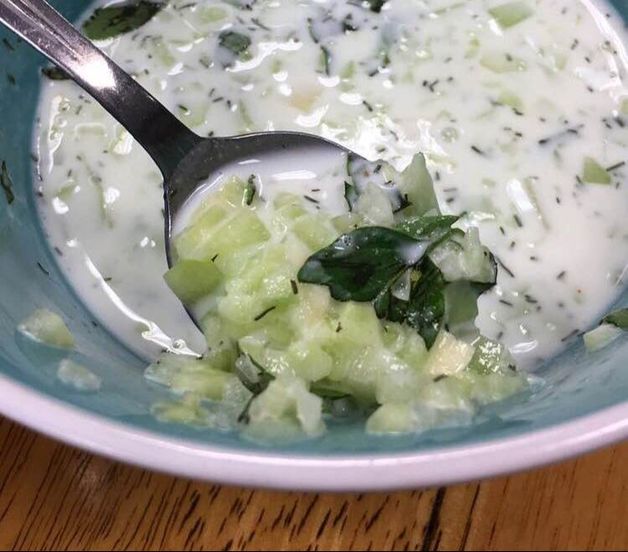
Jicama vs Potatoes:
You may be wondering how I think jicama fries compare to fries made out of potatoes.

The Look: As far as looks go, the fries looked nearly identical.

The Taste: They tasted more sweet but were just as crispy as baked potato fries.I served them to my family giving the choice of a tzatziki sauce dip and guacamole. With the dip, they tasted just as great as regular fries to me!
 
The Picture: Below is a picture of them being served with a turkey burger and cheesy riced broccoli and cauliflower I made to go with them for dinner.

​
Picture
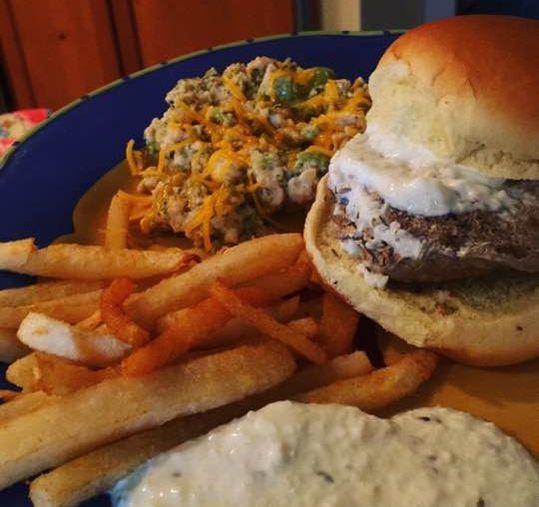
recipe adapted from: healthiersteps.com/baked-jicama-fries/
0 Comments

Garlic Parmesan Carrot Fries (vegan friendly)

2/7/2018

0 Comments

 
This past weekend, I took home a great deal of my week's unfinished carrots. As I always strive to finish an entire bag by myself at school, I was excited to brainstorm ways to finish them. The recipe I ended up preparing was called "Garlic Parmesan Baked Carrot Fries" on Tasty.co. It is one of my little sister's favorites.  After making slight modifications, I followed the following instructions:

Ingredients:
- 2 large carrots
- 1 tablespoon avocado oil
- 1 tablespoon garlic powder
- 1 teaspoon pepper
- 1 teaspoon salt (optional) 
- 1/3 cup fresh parsley or basil (chopped)
- 1/4 cup parmesan cheese
(Link to vegan option):
http://www.goveggiefoods.com/products/grated-topping/vegan/parmesan

Instructions: 
1. Preheat the oven to 400F

2. Slice carrots into 3 portions lengthwise, and in halves for width

3. Toss with garlic, pepper, cheese, and avocado oil

4. Lay carrots evenly onto baking tray 

5.  Sprinkle chopped parsley on top of carrots

6. Bake for 20 minutes (I like them to be crispy!) :) 


The Result:

Picture
Picture
I ended up using a total of four carrots because I enjoyed them that much. These would be a great snack to include at a family dinner or for a social gathering with friends. If you click the button below, you can also see a dip that Tasty.co created for them. 

Find the recipe this was modified from here!
0 Comments

A Healthier summer dip

1/22/2018

0 Comments

 
Avocado Cilantro Dip

As I have been missing the warmer months, I reflected on the recipes I would prepare for my beach trips in the summer. I remembered craving a dip with a summery twist before leaving for my friend Allison's beach house. The dip I had decided to make was modified from  Rachael Ray’s Creamy Avocado-Cilantro dip. The ingredients were simple. It had avocados, sour cream, cilantro and lime juice. Modifications I made were replacing the sour cream with plan Greek yogurt, while adding a higher exchange of yogurt in place of sour cream. My reasoning behind this change was that it would add more protein while decreasing the calories in the dip. 


Below are the ingredients I made the dip with:

Yield: 1 ½ cups
Ingredients:
2 large avocados
6 oz nonfat plain Greek yogurt (I used one single serve container of Chobani’s brand)
1 tbsp lime juice
½ cup fresh cilantro

After combining these ingredients in a blender, you can mix all of them together. I personally like to use my NutriBullet, because it is easy to transport.

Picture
0 Comments

When in disney... my favorite entree when making a reservations  vs walking in

1/7/2018

1 Comment

 
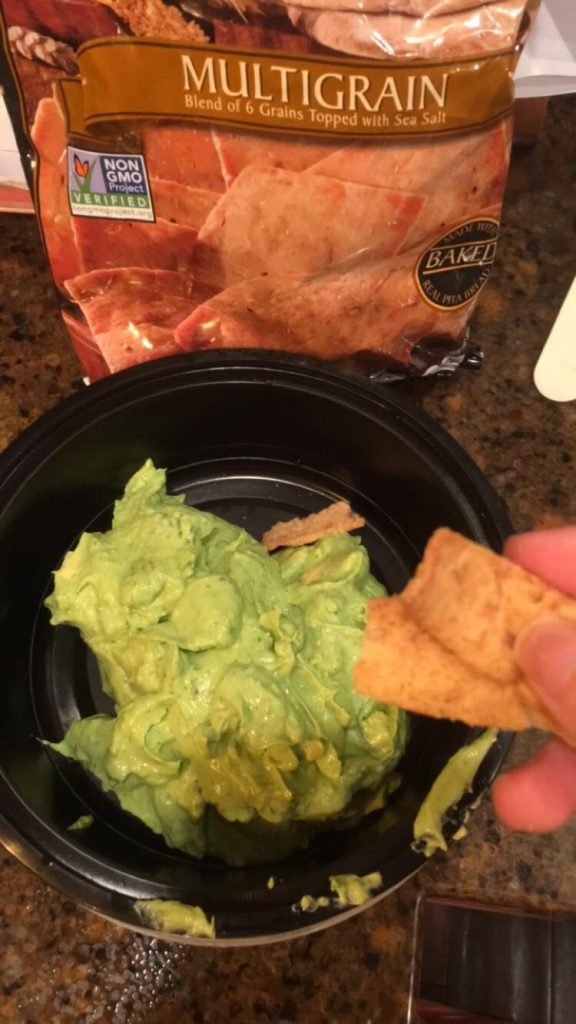
Disney World is one of my favorite places. I fondly look back on my childhood in Disney, because it was my family's most popular vacation location. As if I didn't get to enjoy Disney enough, my older sister had a marketing internship there this past year. As a result... you could say... I visited Disney three times in one year! During this time, I tried many entrees. Below is a description of my favorite entree eaten at both a restaurant with a reservation and one that took "walk-ins". 
​

Reservation Required 
Restaurant: Artist's Point at Disney's Wilderness Lodge 
Price Range: $$$ ($35-$59 per person) 
Entree: Eggplant Panisse 

Picture
Artist Point had a rustic yet elegant feel as it's dining area overlooked Bay Lake. I ate here in March, and tried the "Eggplant Panisse" entree. 

This was a vegetarian entree. Although I am not vegetarian, I've noticed that my love for vegetables has led me to pick the vegetarian option quite often. The main vegetable was eggplant, a rich source of fiber.  It was served with coal fired carrots, lentils, great northern beans, parsley root, young arugula, and tomato. 

Come On, Walk Right In! 
Restaurant: Splitsville at Disney Springs
Price Range: $$ ($15-$34 per person) 
Entree: Super Tuna Sushi Roll

Picture
Splitzville was unique because it had a bowling alley located in the same building. My friends and I enjoyed dining in such a retro themed restaurant after shopping at Disney Springs. We listened to rock and roll music as we enjoyed our entrees. The entree I loved was the Super Tuna Sushi Roll. 

As a seafood lover, I was in heaven. From being topped with seared ahi, eel sauce, and tempura, it was filled with shrimp and tuna. It had a memorable flavor with spicy mayonnaise. 
1 Comment

Corelife review

12/29/2017

1 Comment

 
​
Corelife is a new casual dining eatery. They have pre-designed entrees as well as design-able entrees. Options to include in your entree include fresh food items that are free of GMO's, artificial colors, sugars, and additives. Examples would be kale, tomatoes, spinach, tofu, quinoa, steak, and much more. The first location was  opened in Syracuse in 2015. Since this time, they have been a hit and as dozens of other locations were opened.   I decided to check out the location in Allentown, PA.

When I first walked in, I saw water misting off of the produce for bowls. I was then presented with fresh options to design either a green, grain, or a broth themed bowl. Bowls could either be pre-designed  or designed by the customer. The bowl I tried was the pre-designed "Green and Ancient Grains" bowl. It included quinoa, kale, arugula, tomatoes, corn, chickpeas, broccoli, and white cheddar cheese. I picked a large bowl to share with my sister. The arugula and tomatoes made it especially refreshing and energizing. The quinoa and chickpeas provided enough protein for me to feel full throughout the afternoon.  A complimentary slice of bread was also offered  at the check out.

Something unique  about CoreLife was that soda was not served.  The beverage options were much more unique. Examples were "Beet Lemonade" and "Cranberry Cayenne Lemonade." I loved this idea. Although these beverage options originated from beets and cranberries, it is important to remember that even they should still be consumed in moderation. Although there were some nutrients from the fruits and vegetables, sugar was also added to these beverages.  The sugar content was 33 grams and 130 calories in the Beet Lemonade. To compare this to Coke, Coke has 39 grams of sugar and 150 calories in a 12 ounce portion.
Yay or  Nay?
Yay. I would highly recommend going to CoreLife eatery. It was very easy to find both vegan and vegetarian options as well. The only word of advice I would give would be to split the large bowl with a friend. My little sister and I ended up sharing the large bowl. We both agreed that this was the perfect amount to feel satisfied, but not uncomfortably full. Having an eatery that excludes artificial additives, sugars, and colors is a  great step in the right direction.

Here is their website: ​https://corelifeeatery.com/

​
Picture
1 Comment

The Moosewood Cookbook's Cucumber Yogurt Chilled Soup

12/29/2017

2 Comments


In my opinion, Mollie Katzen created one of the best healthy cookbooks. As a result of her book, a Moosewood restaurant opened in Ithaca, New York. My boss as a research assistant was obsessed with this restaurant and the abundant number of vegetarian recipes. Curious, I decided to make one. The recipe I prepared was the cucumber yogurt chilled soup. Slight modifications were made in the process.

Here is how I prepared it with my revisions:

1.  Combine these ingredients:
-  4 c minced cucumbers (You can also grade these if you wish to save time.)
-  2 c nonfat yogurt (This yogurt can have fat content if you wish but I enjoyed using nonfat plain chobani greek yogurt. It is also lower in calorie this way.)
- 2 c water
- 5 garlic cloves (The recipe originally said 4 cloves, but I thought an additional one was needed.)
-1 tablespoon honey 
- 3/4 tsp salt
 -1 tsp dried dill (or one tbsp if fresh)

2. ~refrigerate after stirring together~

3. Top with fresh herbs. The picture shown was from when I used fresh basil. The version with fresh basil was my personal favorite although I also tried preparing it with fresh cilantro. 


​

Picture
Picture
2 Comments
Forward>>

    Author

    Ava is a Registered Dietitian with a BS in Nutritional Science from Penn State University. She completed her postgraduate dietetic internship at Penn Medicine Princeton Medical Center where she had a critical care concentration. She started her RD career working at a level one trauma center providing Medical Nutrition Therapy to patients in the Greater New York City area. She now resides in South Florida as her hospital's full time outpatient dietitian, overseeing outpatient nutrition for  cardiometabolic, bariatric, and hospital medical nutrition therapy.

    Archives

    September 2021
    August 2021
    May 2021
    April 2021
    February 2021
    July 2019
    January 2019
    April 2018
    February 2018
    January 2018
    December 2017

    Categories

    All
    Bariatric Recipes
    Diabetes Friendly
    Dining Out
    Food Spotlight
    Healthy Recipes
    Research Articles
    Traveling

    RSS Feed

Powered by Create your own unique website with customizable templates.
  • Home
  • About
    • About
    • Portfolio
  • Blog